In the animUI, attributes are organized in Sections. Each section has a name and can contain any number of attributes (including none). Sections serve two purposes in the setup:
They group the attribute sliders into different collapsable areas in the lower part of the UI.
They are used to quickly select the attributes to operate on when using presets and the mirroring functions.
Creating sections and including attributes in the setup is done in the Section Manager.
Hint Since version 2.1.0 of the script, you can also export your sections into the library. See 4.8 Preset/Section Library. |
The Section List
The list on the upper right side of the UI is the section list. It contains all sections that you’ve set up for The Current Object.
Hint Double-click on a section to expand its container and scroll to it in the lower part of the UI. |
Section List: Right-Click Menu
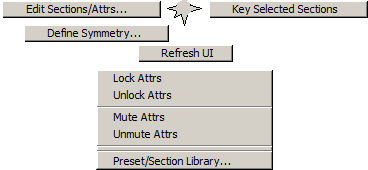
This menu will show up when you right-click in the section list.

Edit Sections/Attrs…
Opens the Section Manager.
Define Symmetry…
Opens the Define Symmetry window.
Key Selected Sections
Sets a keyframe on all attributes of the sections that are selected in the section list.
Refresh UI
Rebuilds all the sliders and the lists’ contents. This might be useful when you’ve e.g. changed the bilateral state of a bcs weight and need to update the sliders.
Preset/Section Library…
Opens the Preset/Section Library.
Lock/Unlock and Mute/Unmute
These are just convenience functions for locking and muting all attributes of the selected sections.
Section List: CTRL+Right-Click Menu
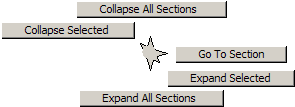
This menu will show up when you right-click in the section list while holding down the CTRL key.
Note The view menu was previously opened using the middle mouse button. As this doesn’t work in Linux with Maya 2010 and earlier, CTRL+right-click is now used instead. On Windows, the old middle-click behaviour is still supported but is considered deprecated for consistency’s sake. |

Collapse All Sections
Collapses all attribute containers in the lower part of the UI.
Expand All Sections
Expands all attribute containers in the lower part of the UI.
Collapse Selected
Collapses the selected sections’ containers in the lower part of the UI.
Expand Selected
Expands the selected sections’ containers in the lower part of the UI.
Go To Section
Scrolls the lower part of the UI to the selected section so that you can start tweaking the attributes.
Mirror Sections
The area above the section list has two marking menus. One for the right and one for the middle mouse button.
![]()
|
Top << Bottom
Takes the attributes of the selected sections and copies the values of the attributes defined as bottom (if any) to their corresponding top attribute. This effectively mirrors from bottom to top.
Top >> Bottom
Same as above, but copies from the Top to the Bottom attributes.
Left << Right
Same as above, but copies from the Right to the Left attributes.
Left >> Right
Same as above, but copies from the Left to the Right attributes.
Top <-> Bottom
Takes the attributes of the selected sections and exchanges the values of the top-bottom pairs. This effectively flips their values.
Left <-> Right
Same as above, but flips the values of the left-right pairs.
Advanced Info To use these features, the script needs to know which attributes belong together, of course. In most cases, this is found out automatically based on the attribute names. There are situations in which this doesn’t work. To still be able to use syncing, you can manually define left-right and top-bottom pairs using the Define Symmetry window. |

